Agate is having a moment in the spotlight and I couldn't be happier. The colors, pattern, and texture have such an organic, fluid feel. I've had my eye on some agate art but haven't been able to think of the perfect place for it. This DIY project was just what I needed to fill the gap. Making these coasters was so much fun! It is easy, doesn't take too long, you probably already have the materials around the house, and the results are beautiful!

Supplies Needed:
- White Square Glazed Tiles ( mine were 4.25" x 4.25" )
- Colored Sharpie Markers
- Rubbing Alchohol
- Paper Towels
- Paint Brushes
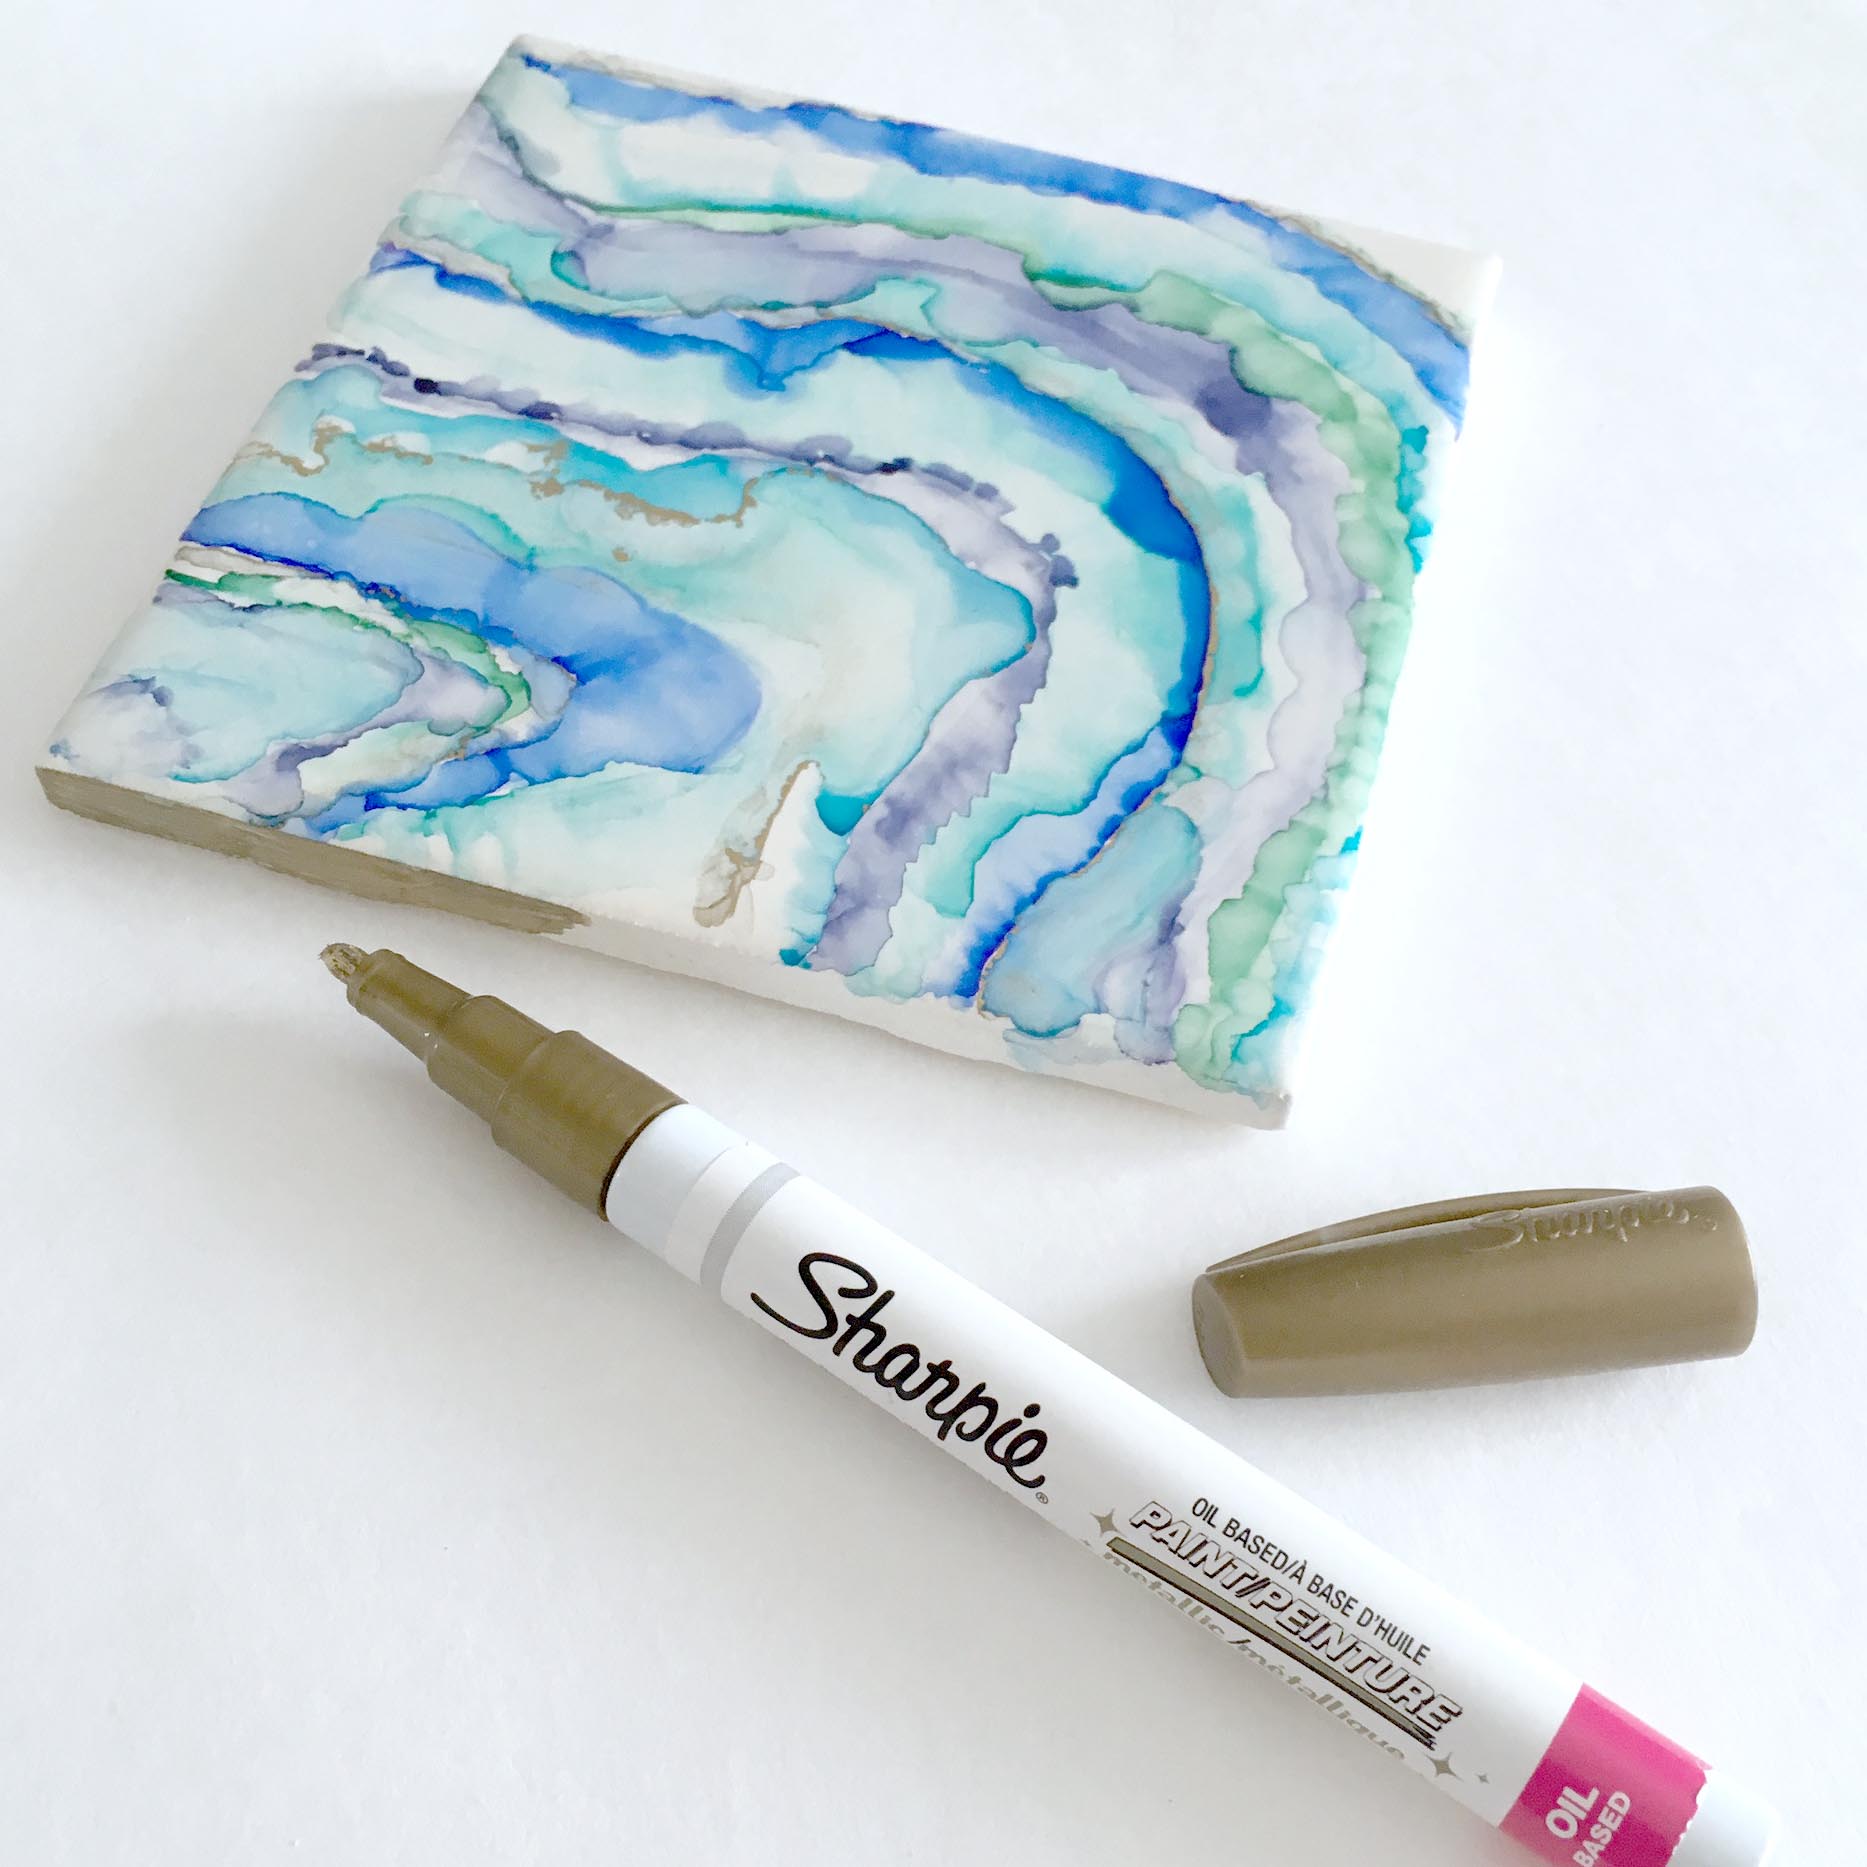
- Gold OIL BASED Sharpie
- Clear Glaze


Before you start working on a tile, it is helpful to decide what the color palette is going to be. I like to select a fairly monochrome set of colors for each tile. Don't hesitate to use a color on more than one tile, however. In fact, this will help to unify the set as a whole.
Creating the Agate Effect
- Start by drawing a curved line across the face of the tile. I think the balance of the pattern is better if you avoid starting directly in a corner.
- Dip your brush in the rubbing alcohol and then push/smear toward the line you drew. This step takes some experimentation but if you make a mistake, just dip a paper towel in rubbing alcohol and wipe it away.
- Repeat the first two steps, being sure to dab your brush dry often.
- Another useful technique is to tilt the tile after you have applied some rubbing alcohol. The rubbing alcohol pushes the ink and you can get pretty creative tilting and rotating the tile.


Gold Veining
Use the gold, oil base Sharpie throughout your pattern to create this incredible veining effect! The oil base reacts a little differently to the rubbing alcohol, and almost clings to the sides of the adjacent colors. Seriously, how amazing are those gold edges!?

Gilded Edges
Once you are happy with the pattern on the surface of your tile, use the gold Sharpie to color the edges of each tile. I recommend doing two sides, waiting a few minutes for those to dry, and then finishing the last two. It is also important to be careful not to touch the top of the tile as your fingers will smudge the pattern.

Seal the Tile
The next step is to seal the whole tile with a clear coat. This will both protect the beautiful artwork you just created, and seal out any potential moisture when being used as a coaster. I am disappointed that the gold veining and edges lose a little bit of their luster when the clear coat is applied, but I have not found an effective alternative. If you find a better product or method, please let me know!
Do not worry if the surface of the tile appears cloudy as you are spraying the sealant--it will clear up as it dries.

Apply Backing
Lastly you will want to choose some sort of a backing for your tile. The purpose of the backing is to protect your tabletop from the scratchy, unfinished side of the tile. Felt is common choice, but personally, I don't think it does this project justice. High quality fabric in a coordinating print or solid would be lovely. I also think small adhesive tabs in the corners would work as well. They are usually made of plastic, rubber, or felt (and yes, felt would be okay in this application).
I actually haven't completed this last step yet because I am considering mounting the tiles inside a frame and hanging them as art. ( Like this )

Save this idea for later or share it with your friends by pinning it to your one of your Pinterest boards! You can also follow us on Pinterest to see more DIY projects and tutorials!