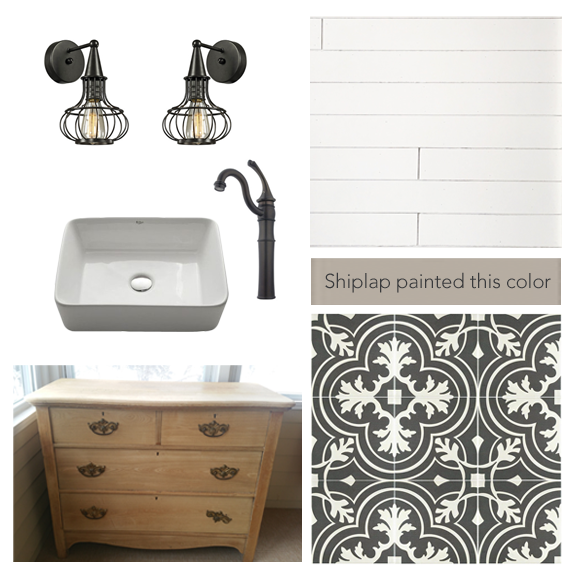
It's week two of the ORC and crazily enough, it has been both a busy and slow week over here working on the bathroom! I was hoping to have more visual progress to show you, but some of the changes and challenges we encountered this week were important to get squared away early on.
It was love at first sight when I found the new vanity light fixture I wanted to use. I actually had it ordered a month and a half ago, before I had even narrowed down wallpaper selections. I knew there was a 6-8 week lead time on it but it was fine since I was ordering so early. The finish is called vintage gold and it is amazing!! It is matte, perfectly aged, and oh-so-classy. I ran into problems though when I began searching for a new faucet that would coordinate. All the pretty ones with perfectly matching metal finishes were way (like way WAY) out of my budget. It was out of the question to leave the existing silver faucet with the new light so I saved a few contenders that were close in finish and much closer to my budget.

| Source: Bellacor |
Both faucets I saved had a polished brass finish. One, a centermount with modern art deco lines, and the second, a mini spread with a very traditional look. My husband nixed the art deco one so I put the second one in my cart and heaved a sigh. It's hard to spend $100 on something you don't absolutely love.
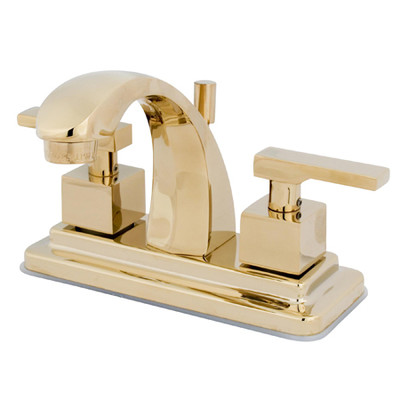
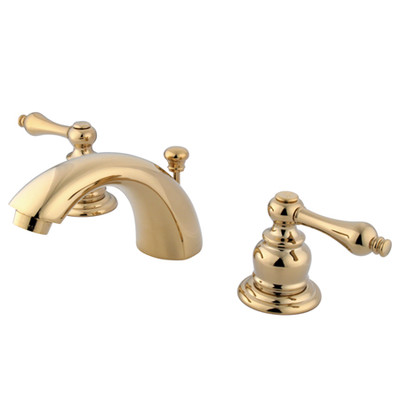
| Sources: Art Deco - Wayfair | Tradtional - Wayfair |
That's when I had the thought, "what if don't replace the faucet at all and just choose a different light fixture?". I know, I'm a little sad too because that first one is so great, but I started looking anyway. And I found a darling light in brushed nickel that is perfect. It's a different look to be sure, but I really think I like it equally, though differently. The other bonus is that, not only does this save me some money by not replacing the faucet, the light itself is $100 less expensive!

| Source: Wayfair |
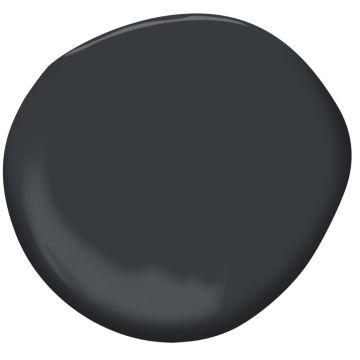
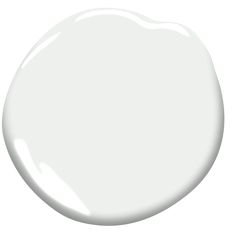
Along with lots of calculations related to the faux shiplap installation (where we want it to start and stop, where the cuts should be, what size boards to cut the plywood into, etc) I also selected the paint colors for the shiplap and vanity. I'm going with White Diamond by Benjamin Moore for the shiplap and Black Ink also by BM for the vanity. I thought for a hot minute about painting ceiling a dark, dramatic color but it's coated in a sand paint that I think would look funny with a dark color and I'm pretty sure it can't be scraped like some popcorn ceilings can, but rather would need a skim coat. Honestly, I moved on pretty quickly from the idea and I think a fresh coat of white will still do wonders.
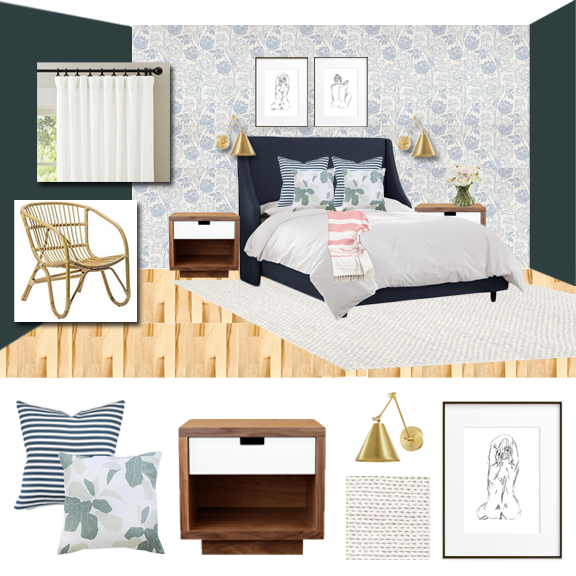
Lastly, I fell in love with a piece of art from Minted that I decided to use in place of the one on the original mood board. (If you missed that post last week, you can find it here). I've updated the mood board to reflect these developments and I'd love to know your thoughts!

Be sure to follow along with the progress the other guest designers made this week by checking out this post!