How to Paint a Striped Wall

striped wall // black and white stripes // entryway

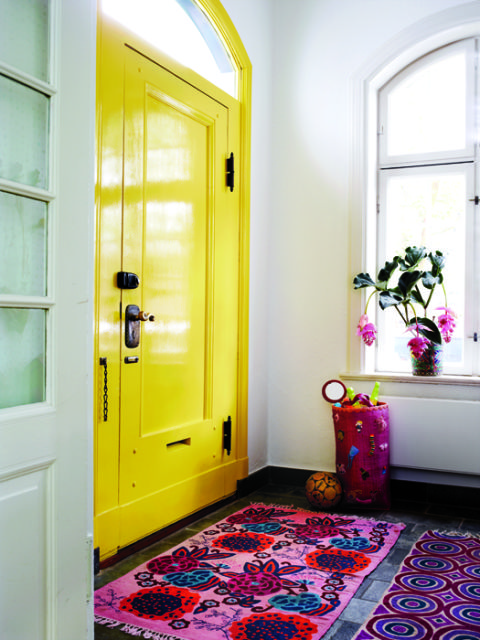
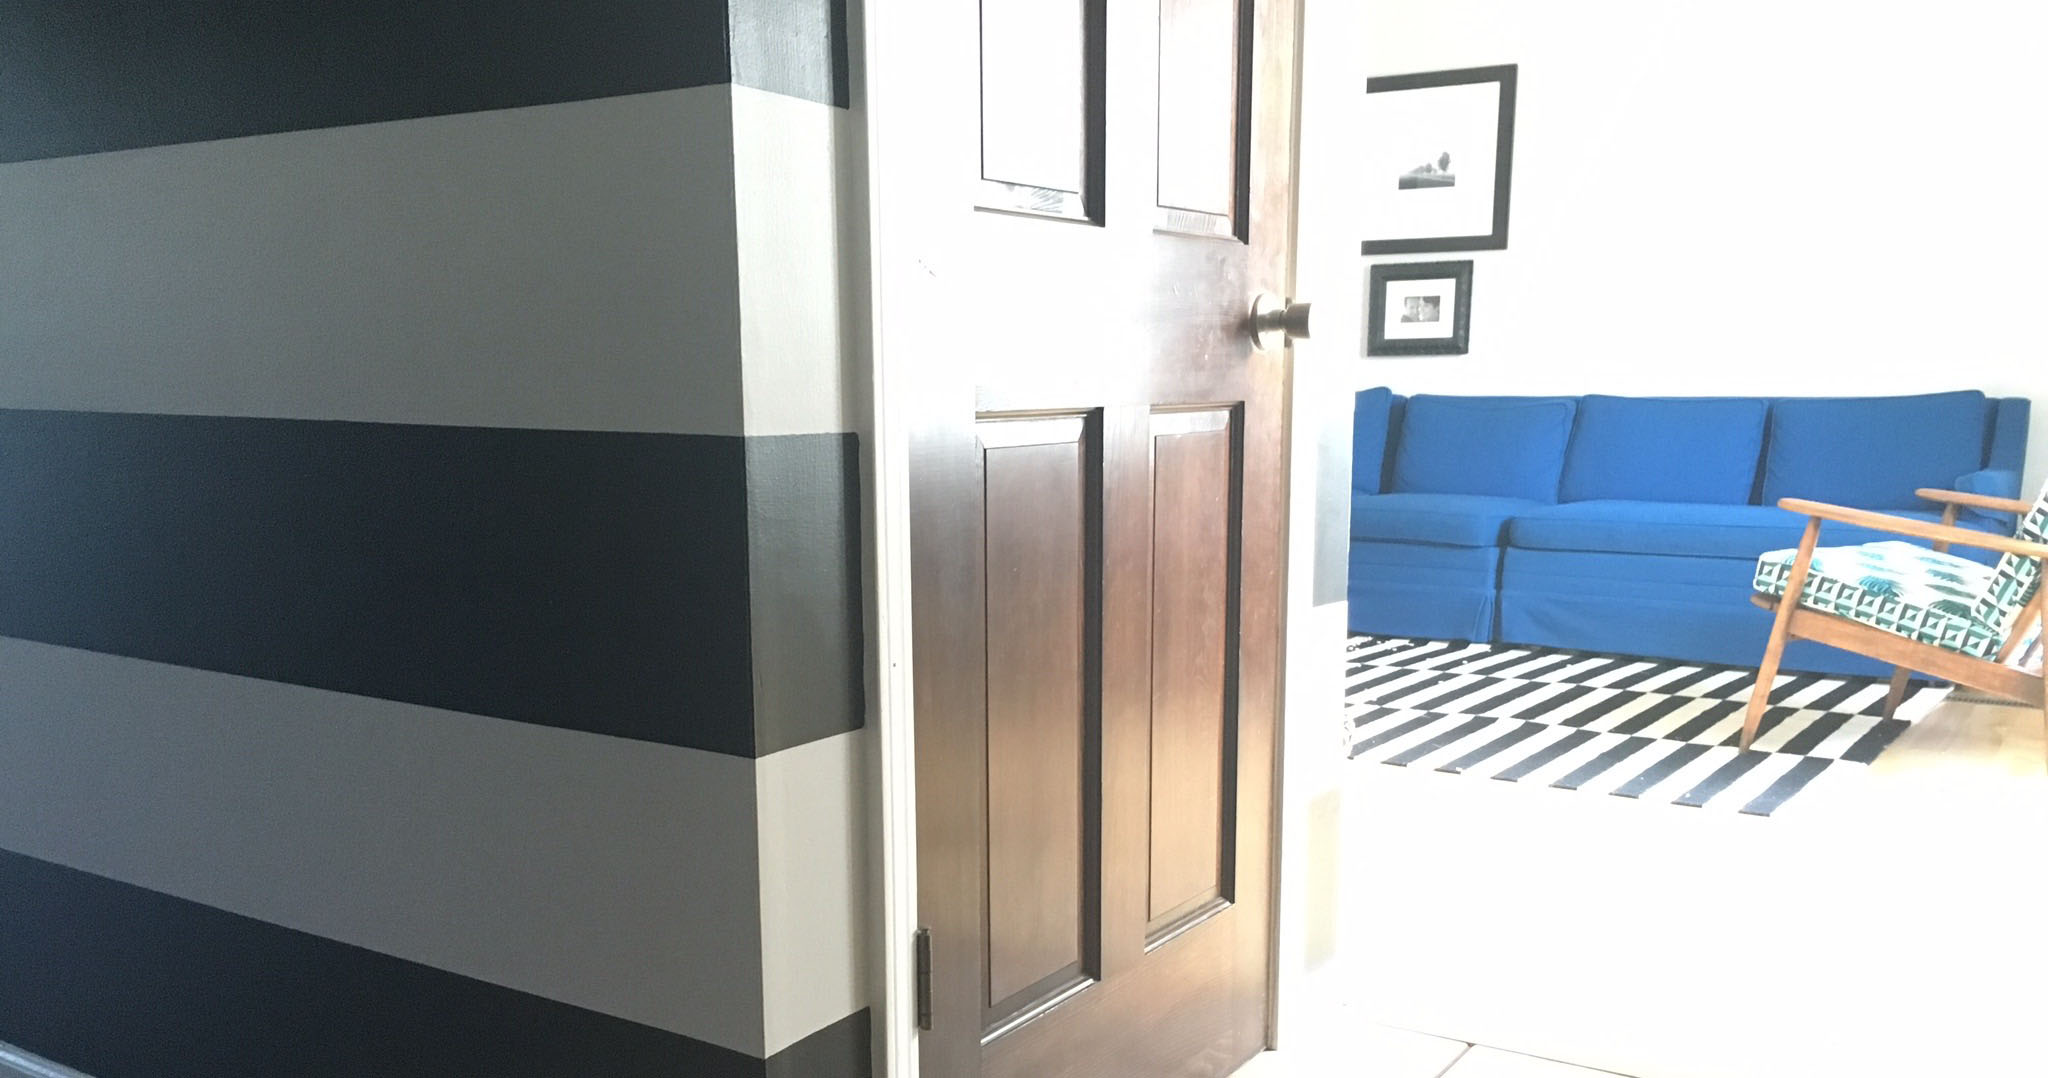
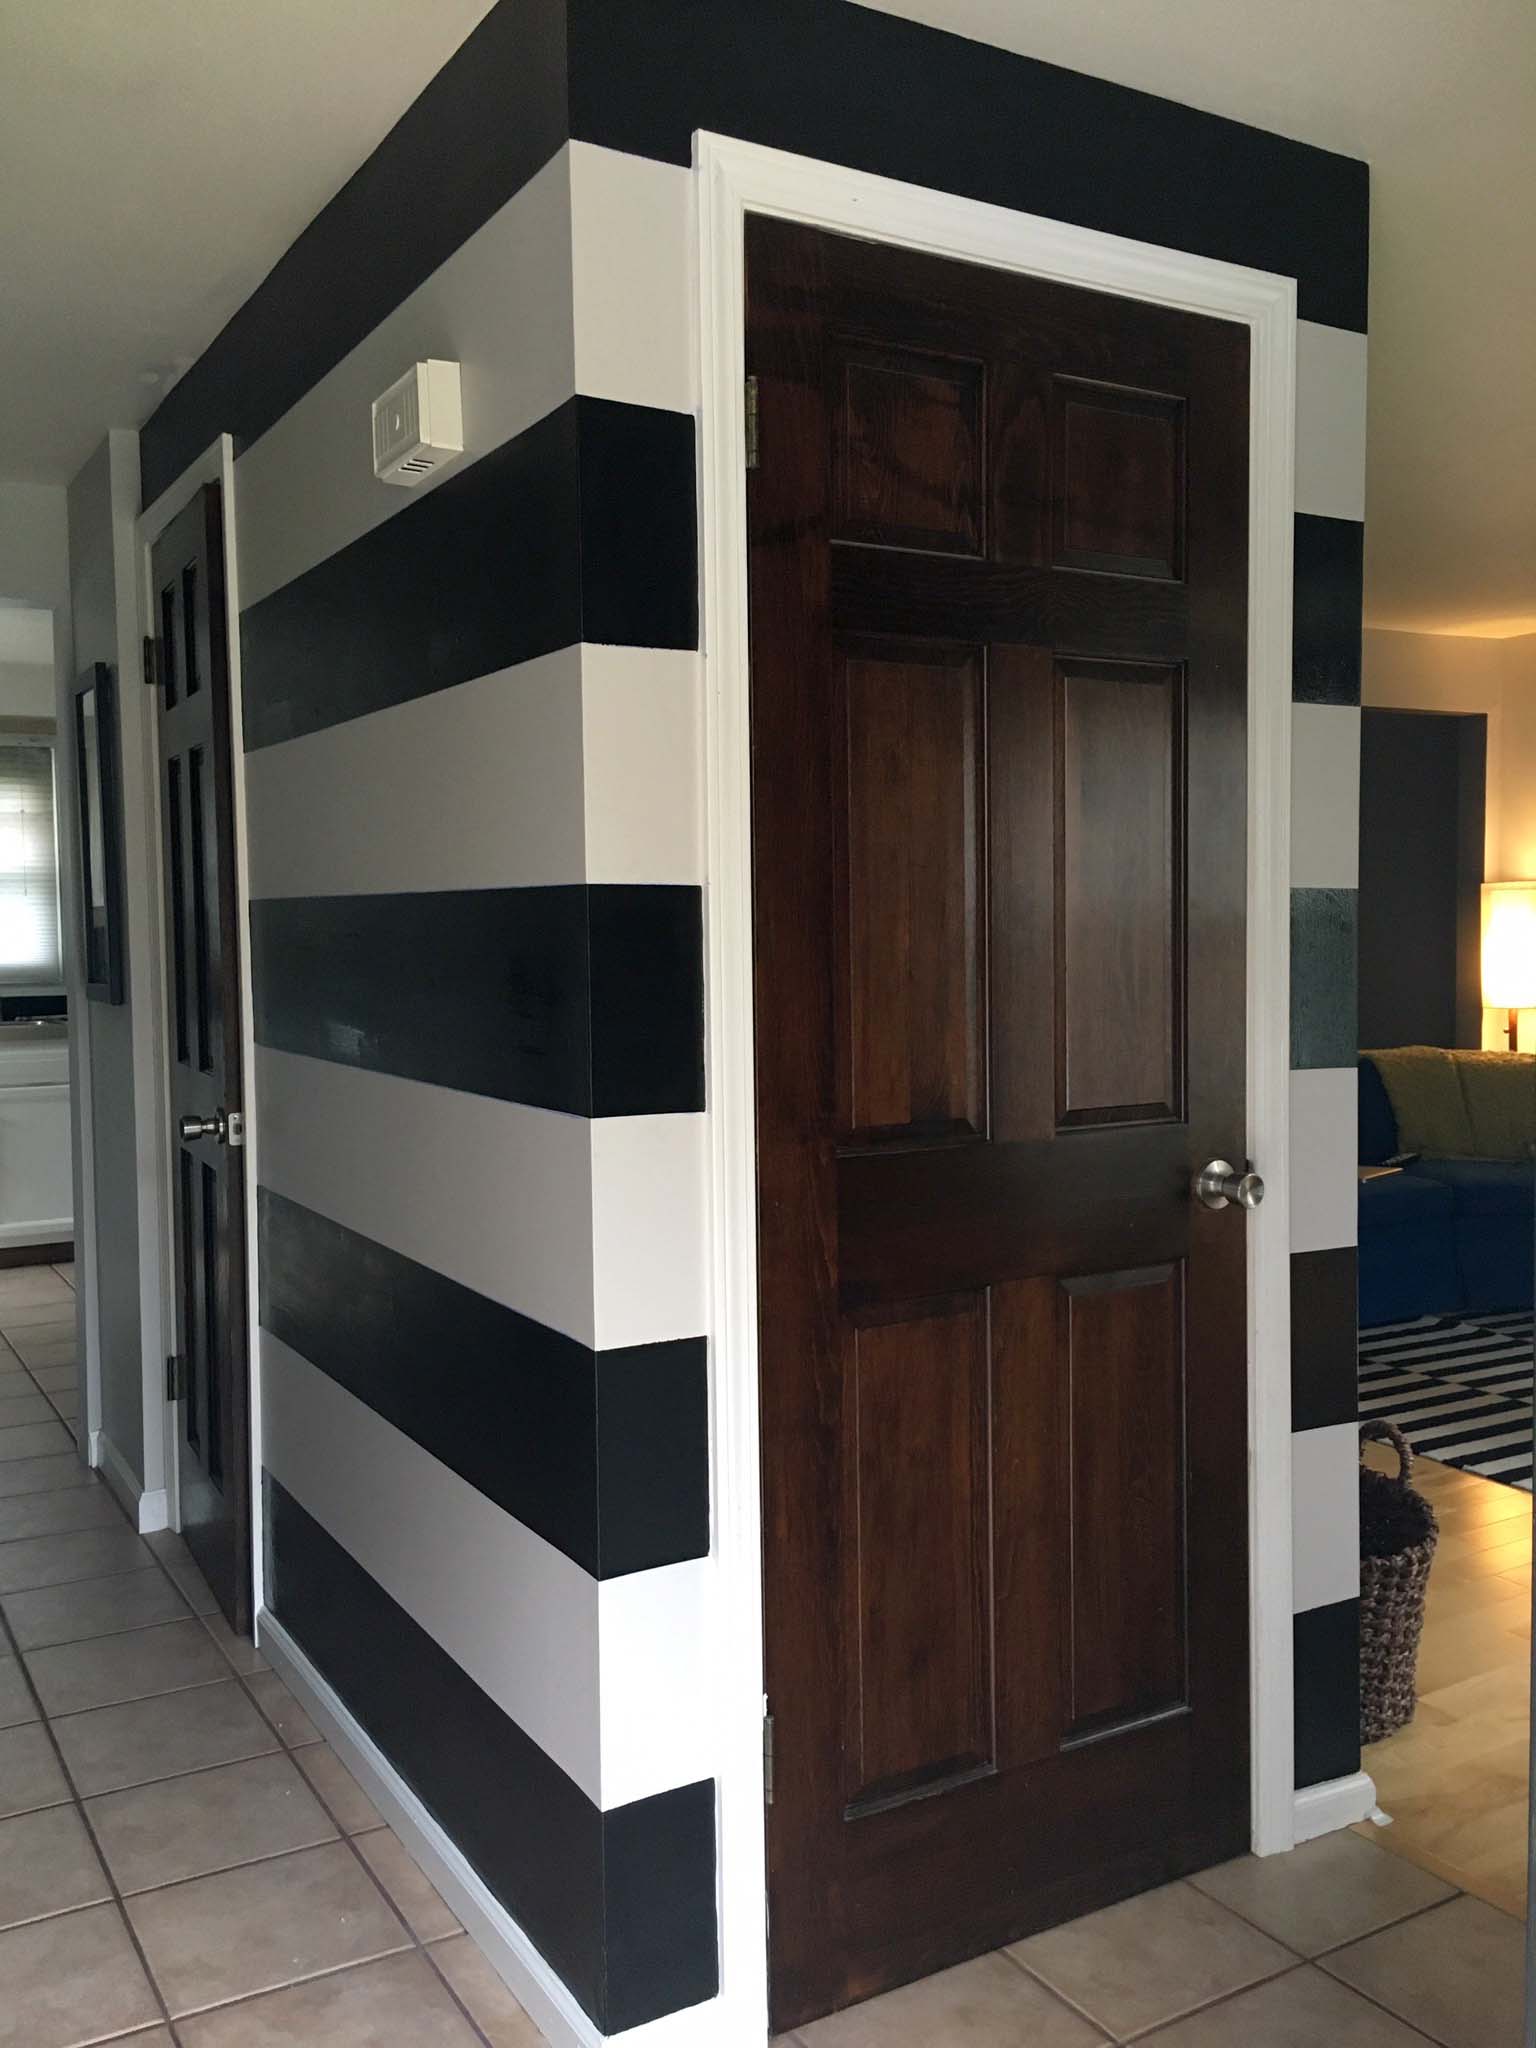
I am so excited to share this project with you because I absolutely love how it turned out! I've been thinking about it for awhile but hadn't found the time, or nerve, or something to get it done. This isn't my first go-around with painting stripes on my walls, but this is definitely the most bold. Last time, I painted a wall in our living room with vertical stripes in two very similar shades for a calm, subtle look. This time I decided horizontal stripes were right for two reasons: with high contrast colors I didn't want to risk the circus tent effect, and because this is in an entry/hallway I felt like the horizontal stripes would be welcoming and draw you into our home. 

So, without further ado--our new striped entryway!
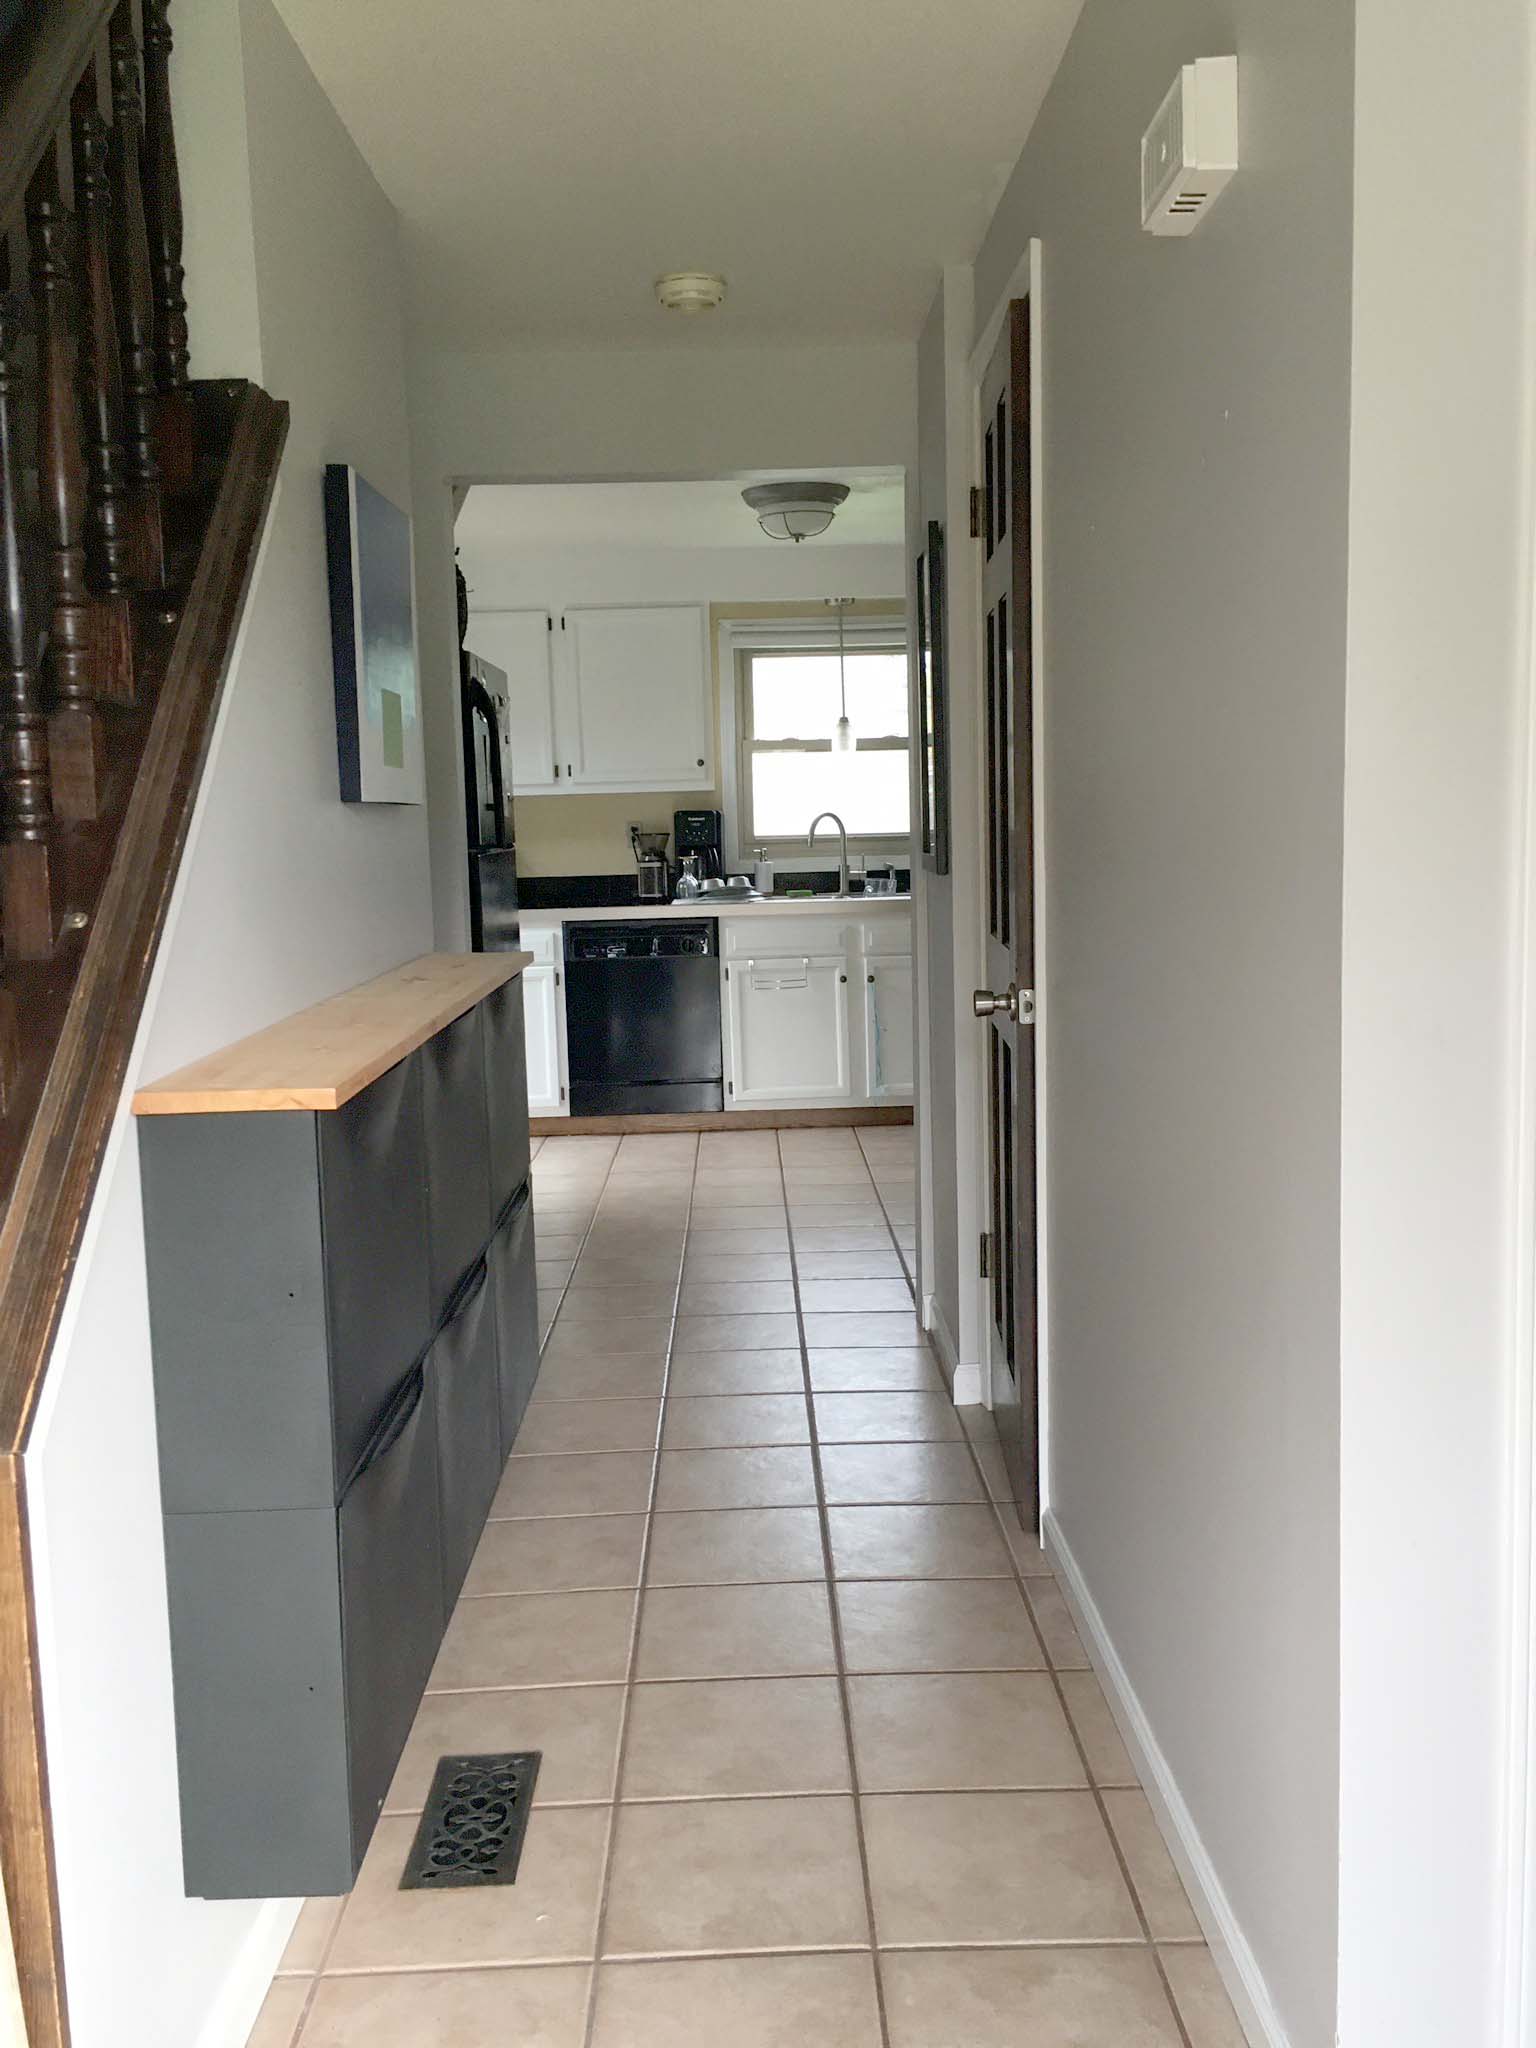
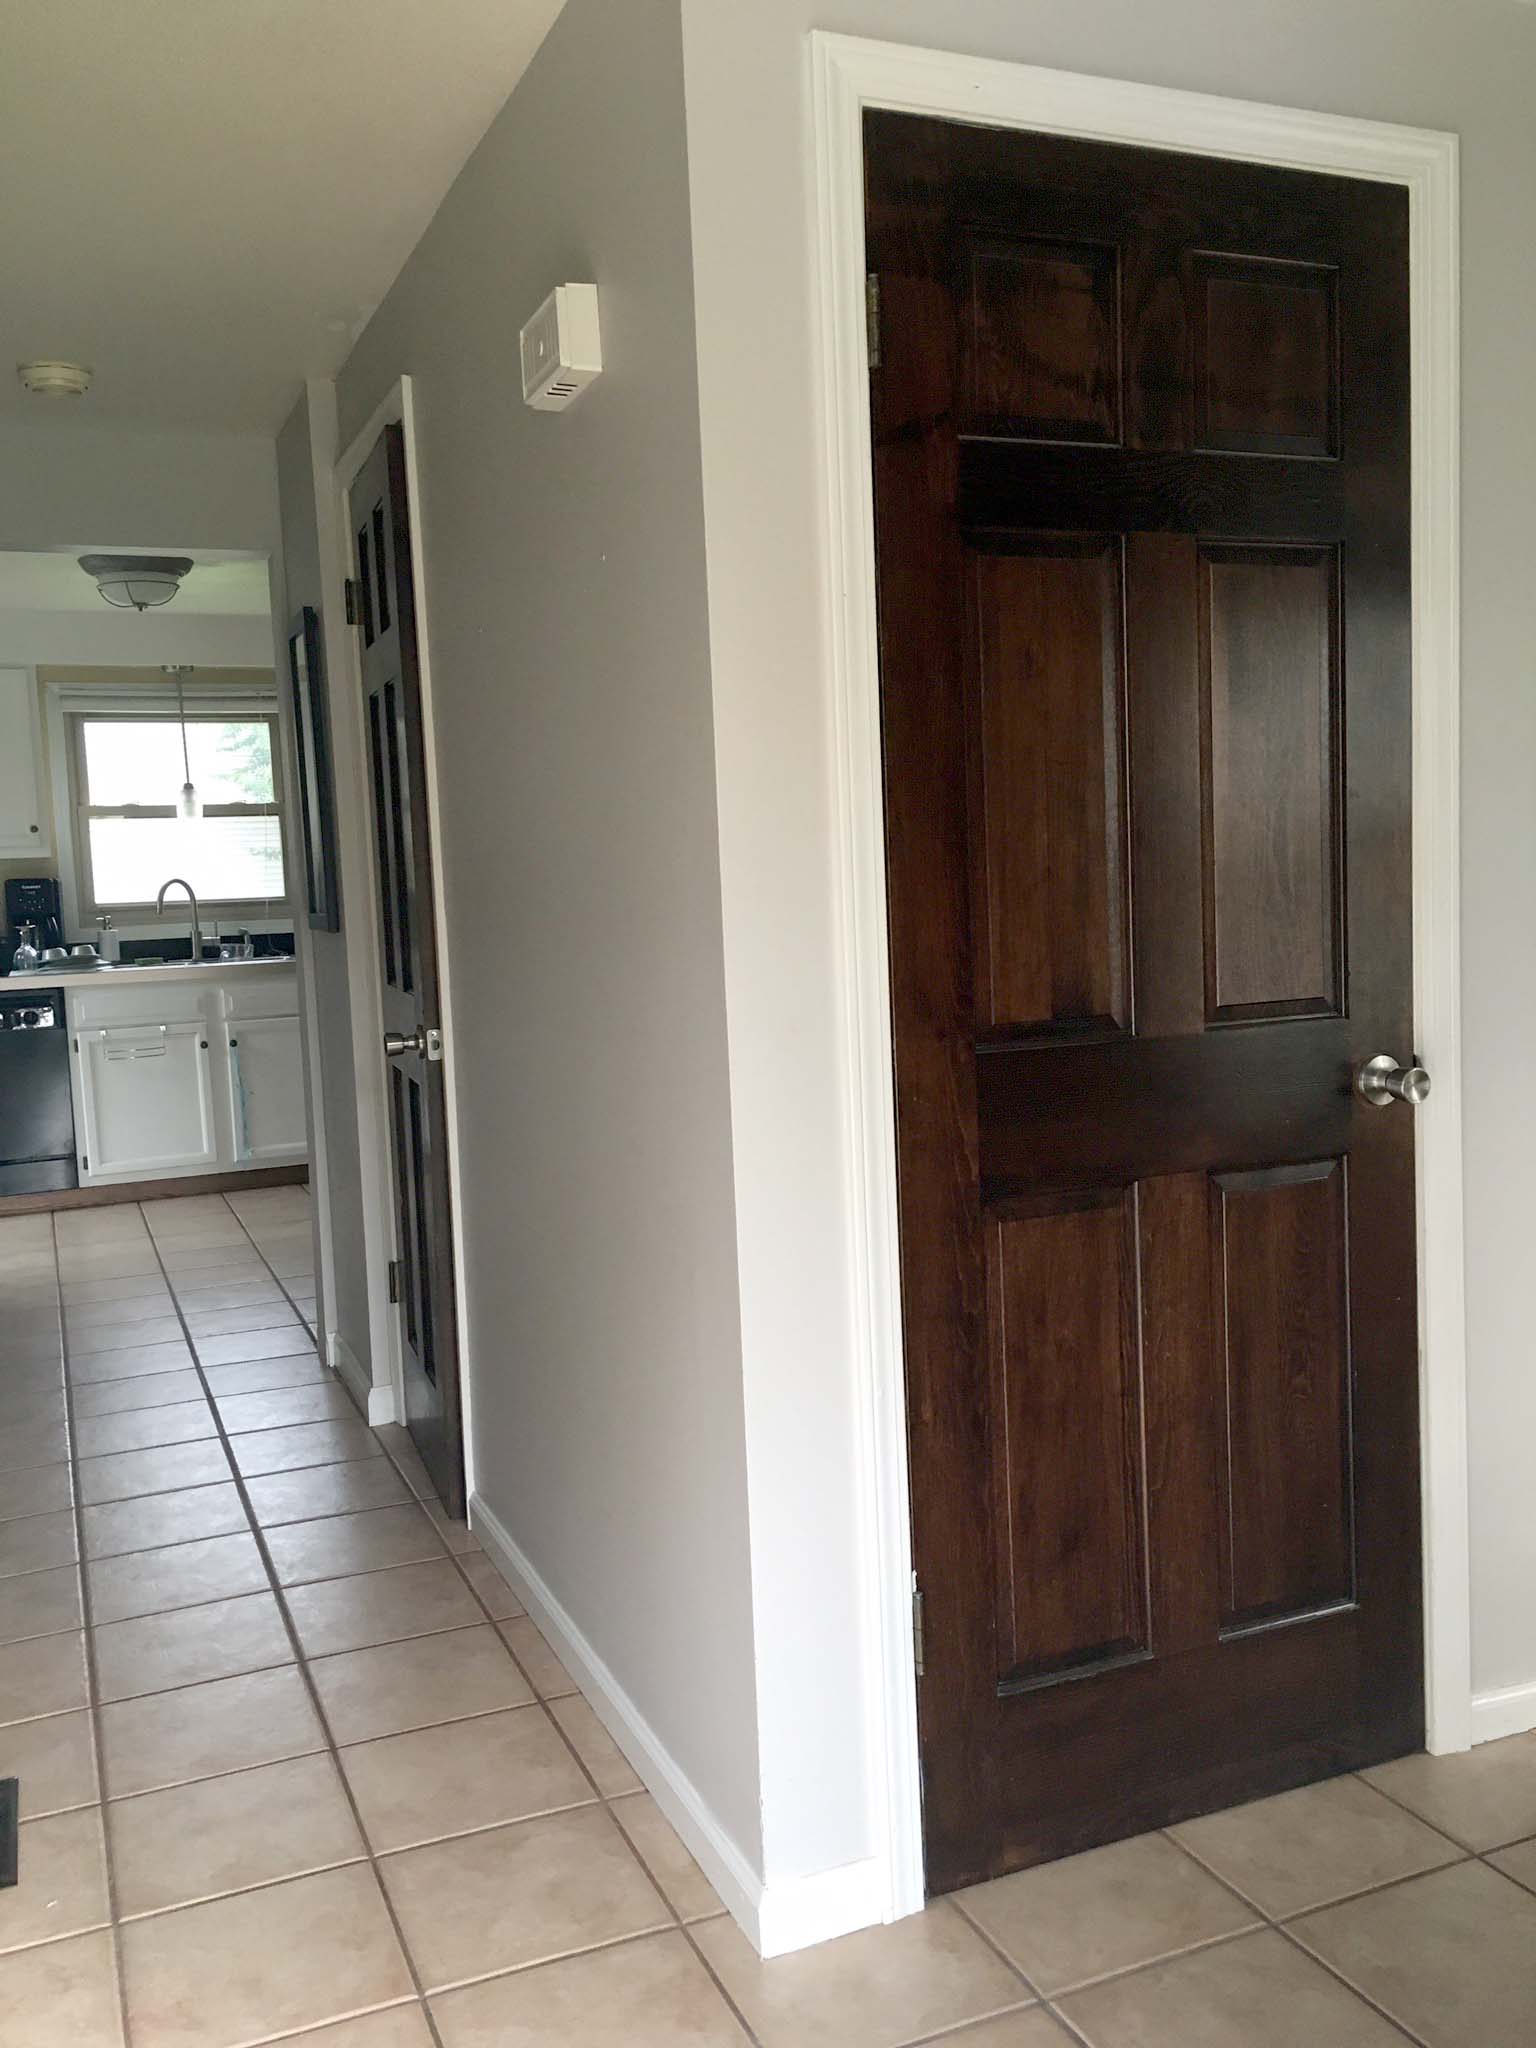
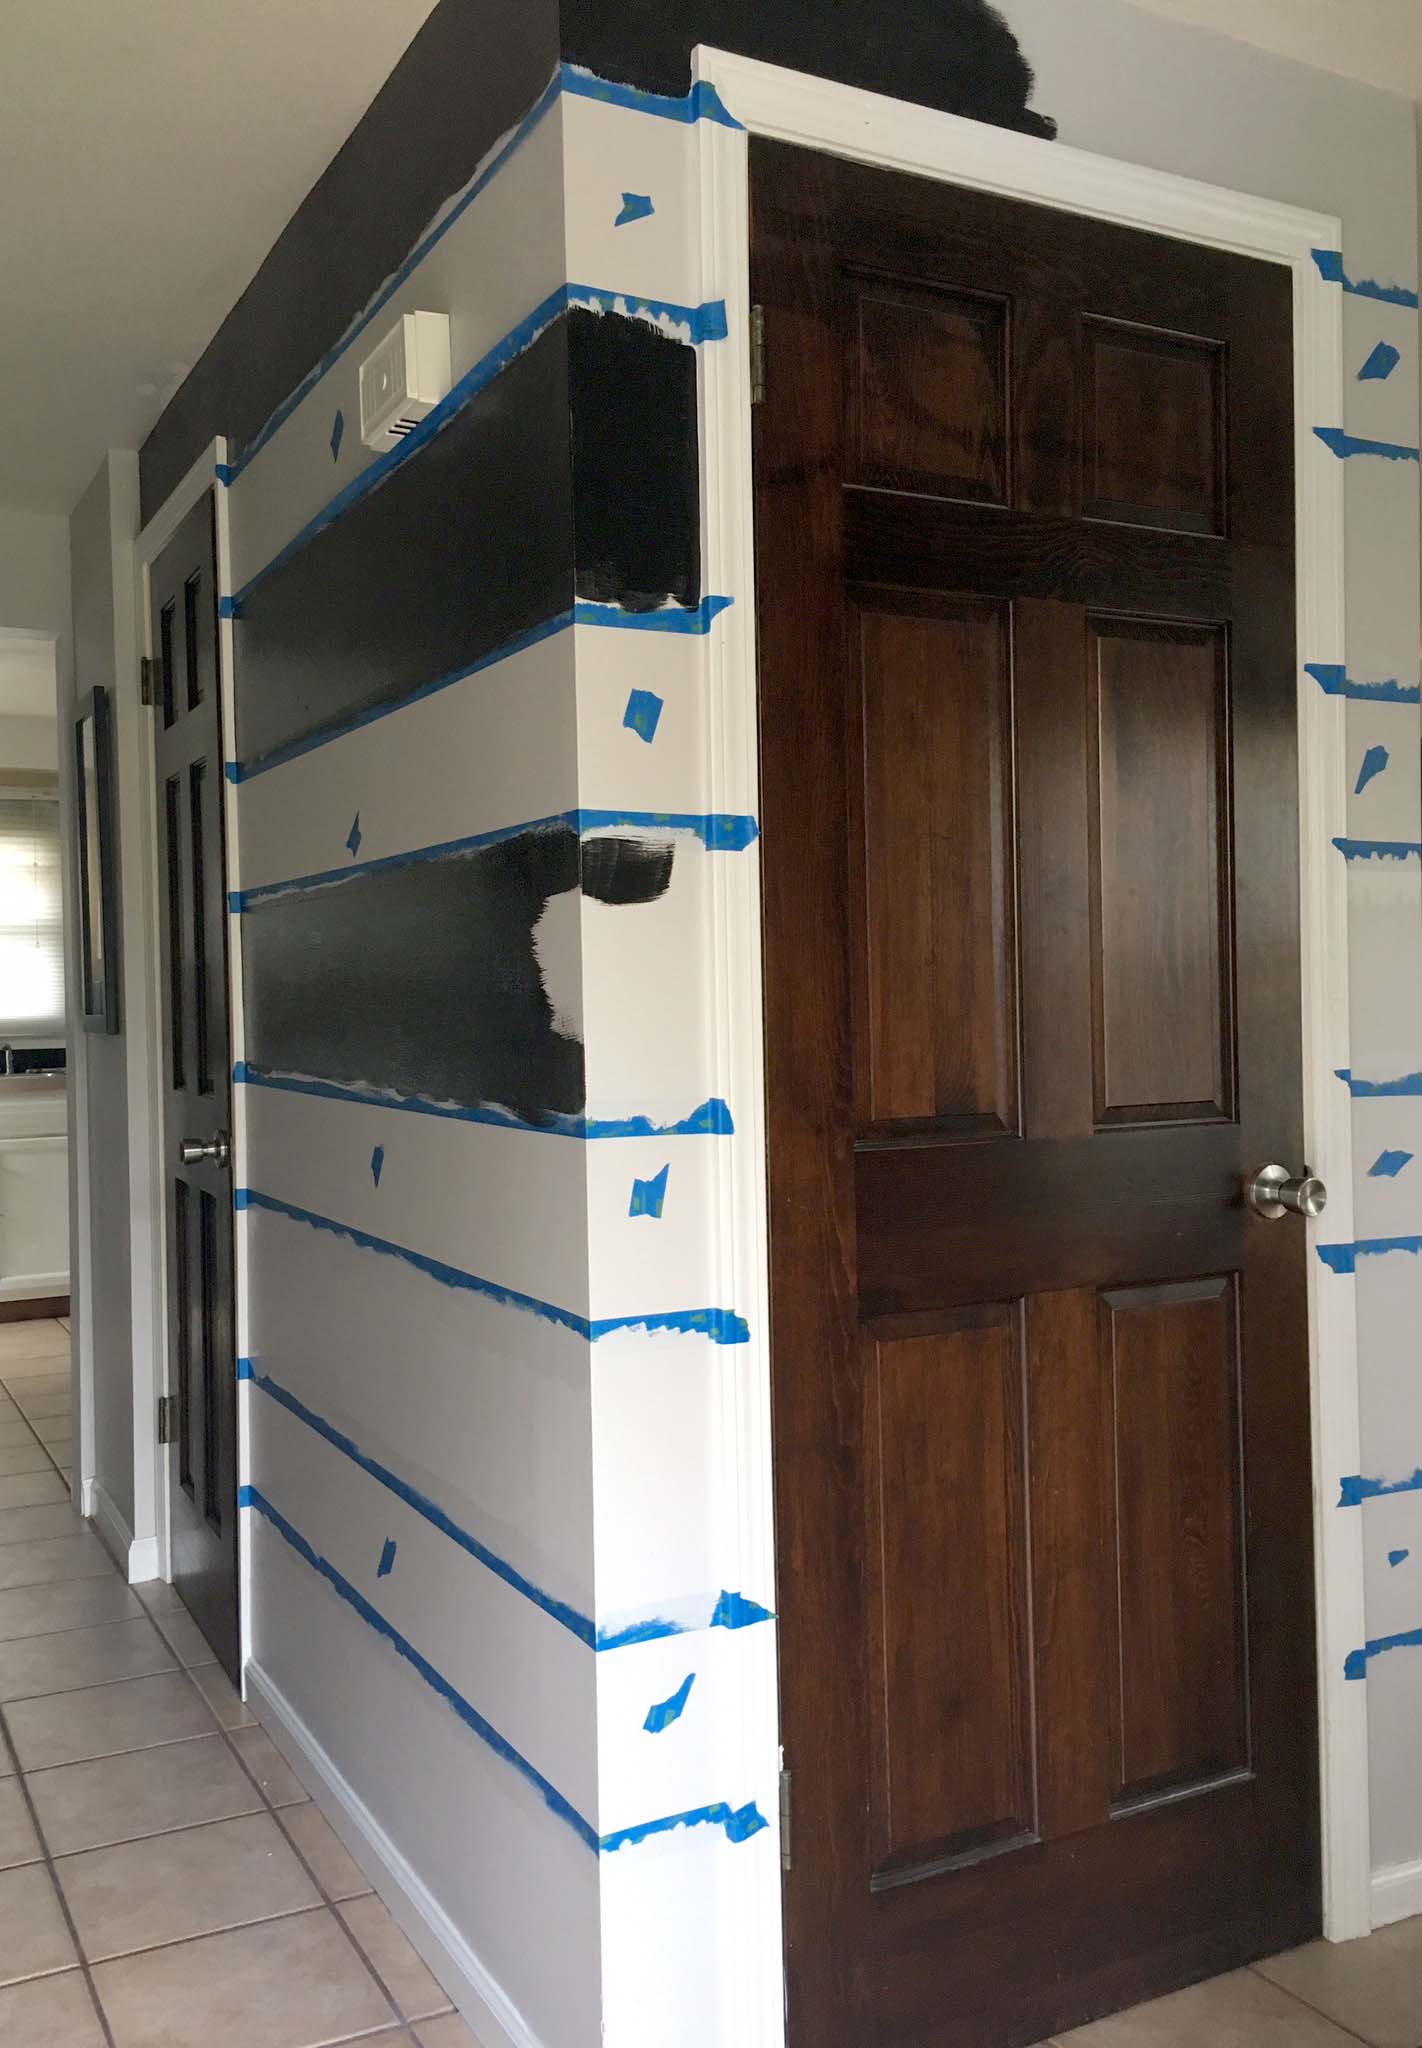
Before pictures:

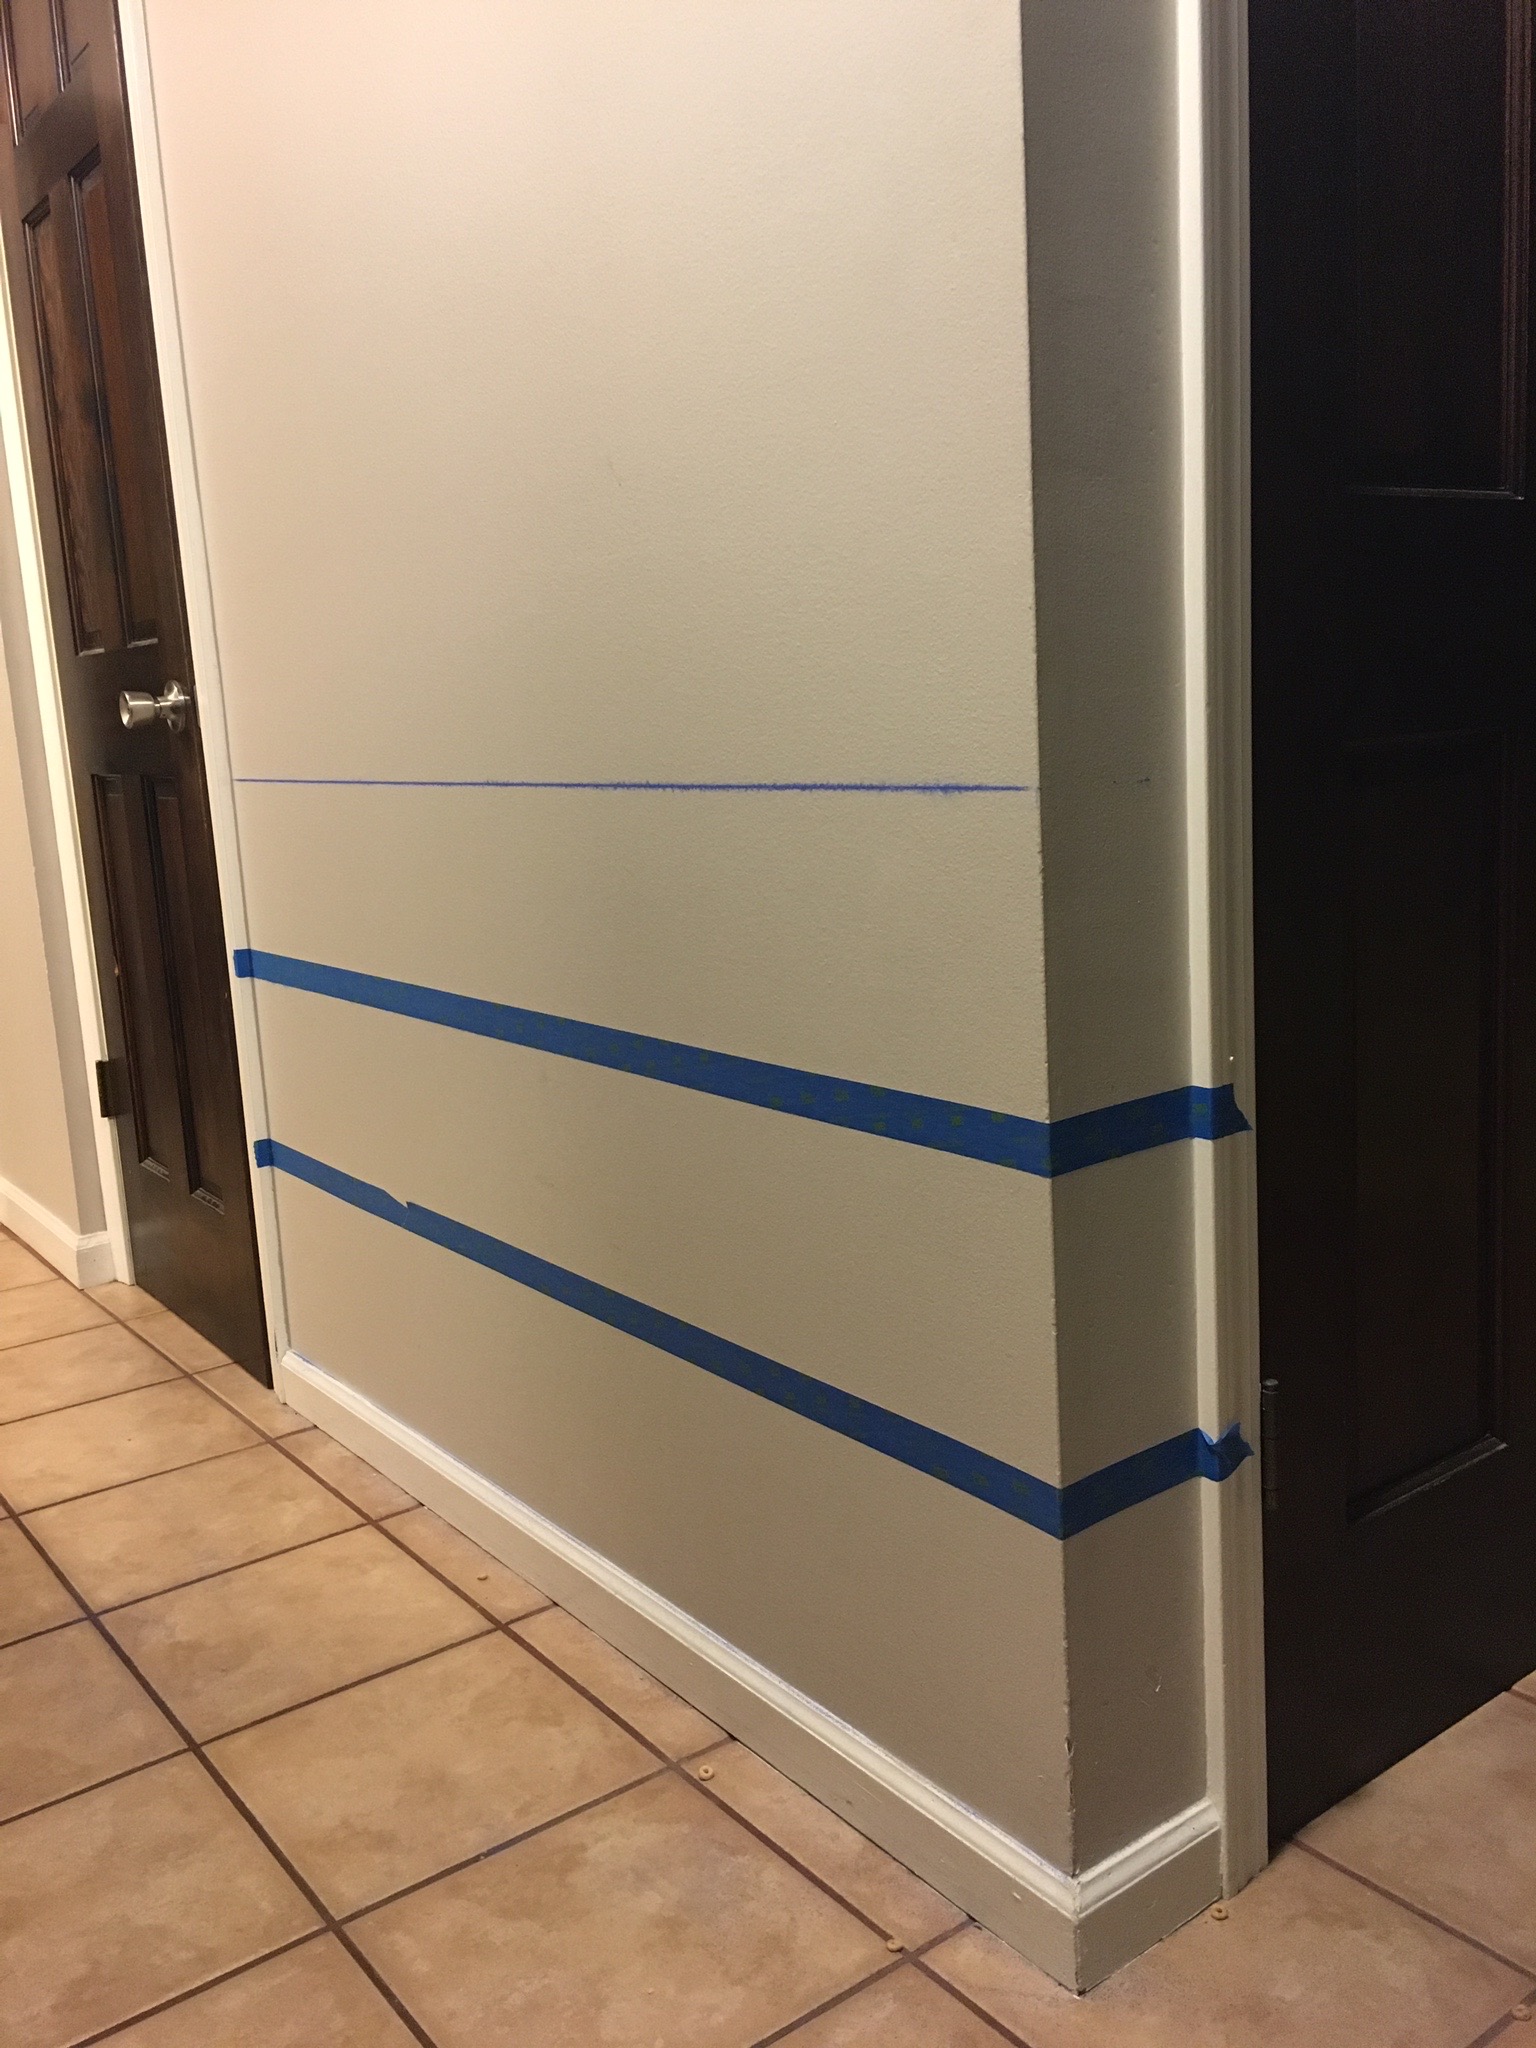
Before I started with any taping or painting, I made a quick sketch of the wall and made note of the wall height so I could calculate how many stripes I wanted and what size they needed to be. The wall is 90" - 3" baseboards, so the total height I needed to divide into stripes was 87". 87/9 = 9.66 or 9 2/3. I decided to make my marks at 9 3/4 because this was an easier increment with the tape measure I had on hand. I started measuring from the bottom, so that the difference would be made up at the top of the wall, further from the eye. I decided to measure and then tape each line as I went so I didn't risk losing, or confusing, my tiny pencil marks. My husband was so kind to help me with this part of the process (it is MUCH easier with two people!) and had the genius idea to use a chalk line. This helped connect our measurements in a straight line that we then used as a reference to tape. 

Pro Tip: When measuring and taping, remember that the tape counts in your measurement. The stripes that are meant to be painted will appear larger because the size of the tape (in this case 1") is being counted into the height of the not-to-be-painted stripes. This means that for the sections you wish to paint, measure between the tape, and for the other sections, measure including the tape.

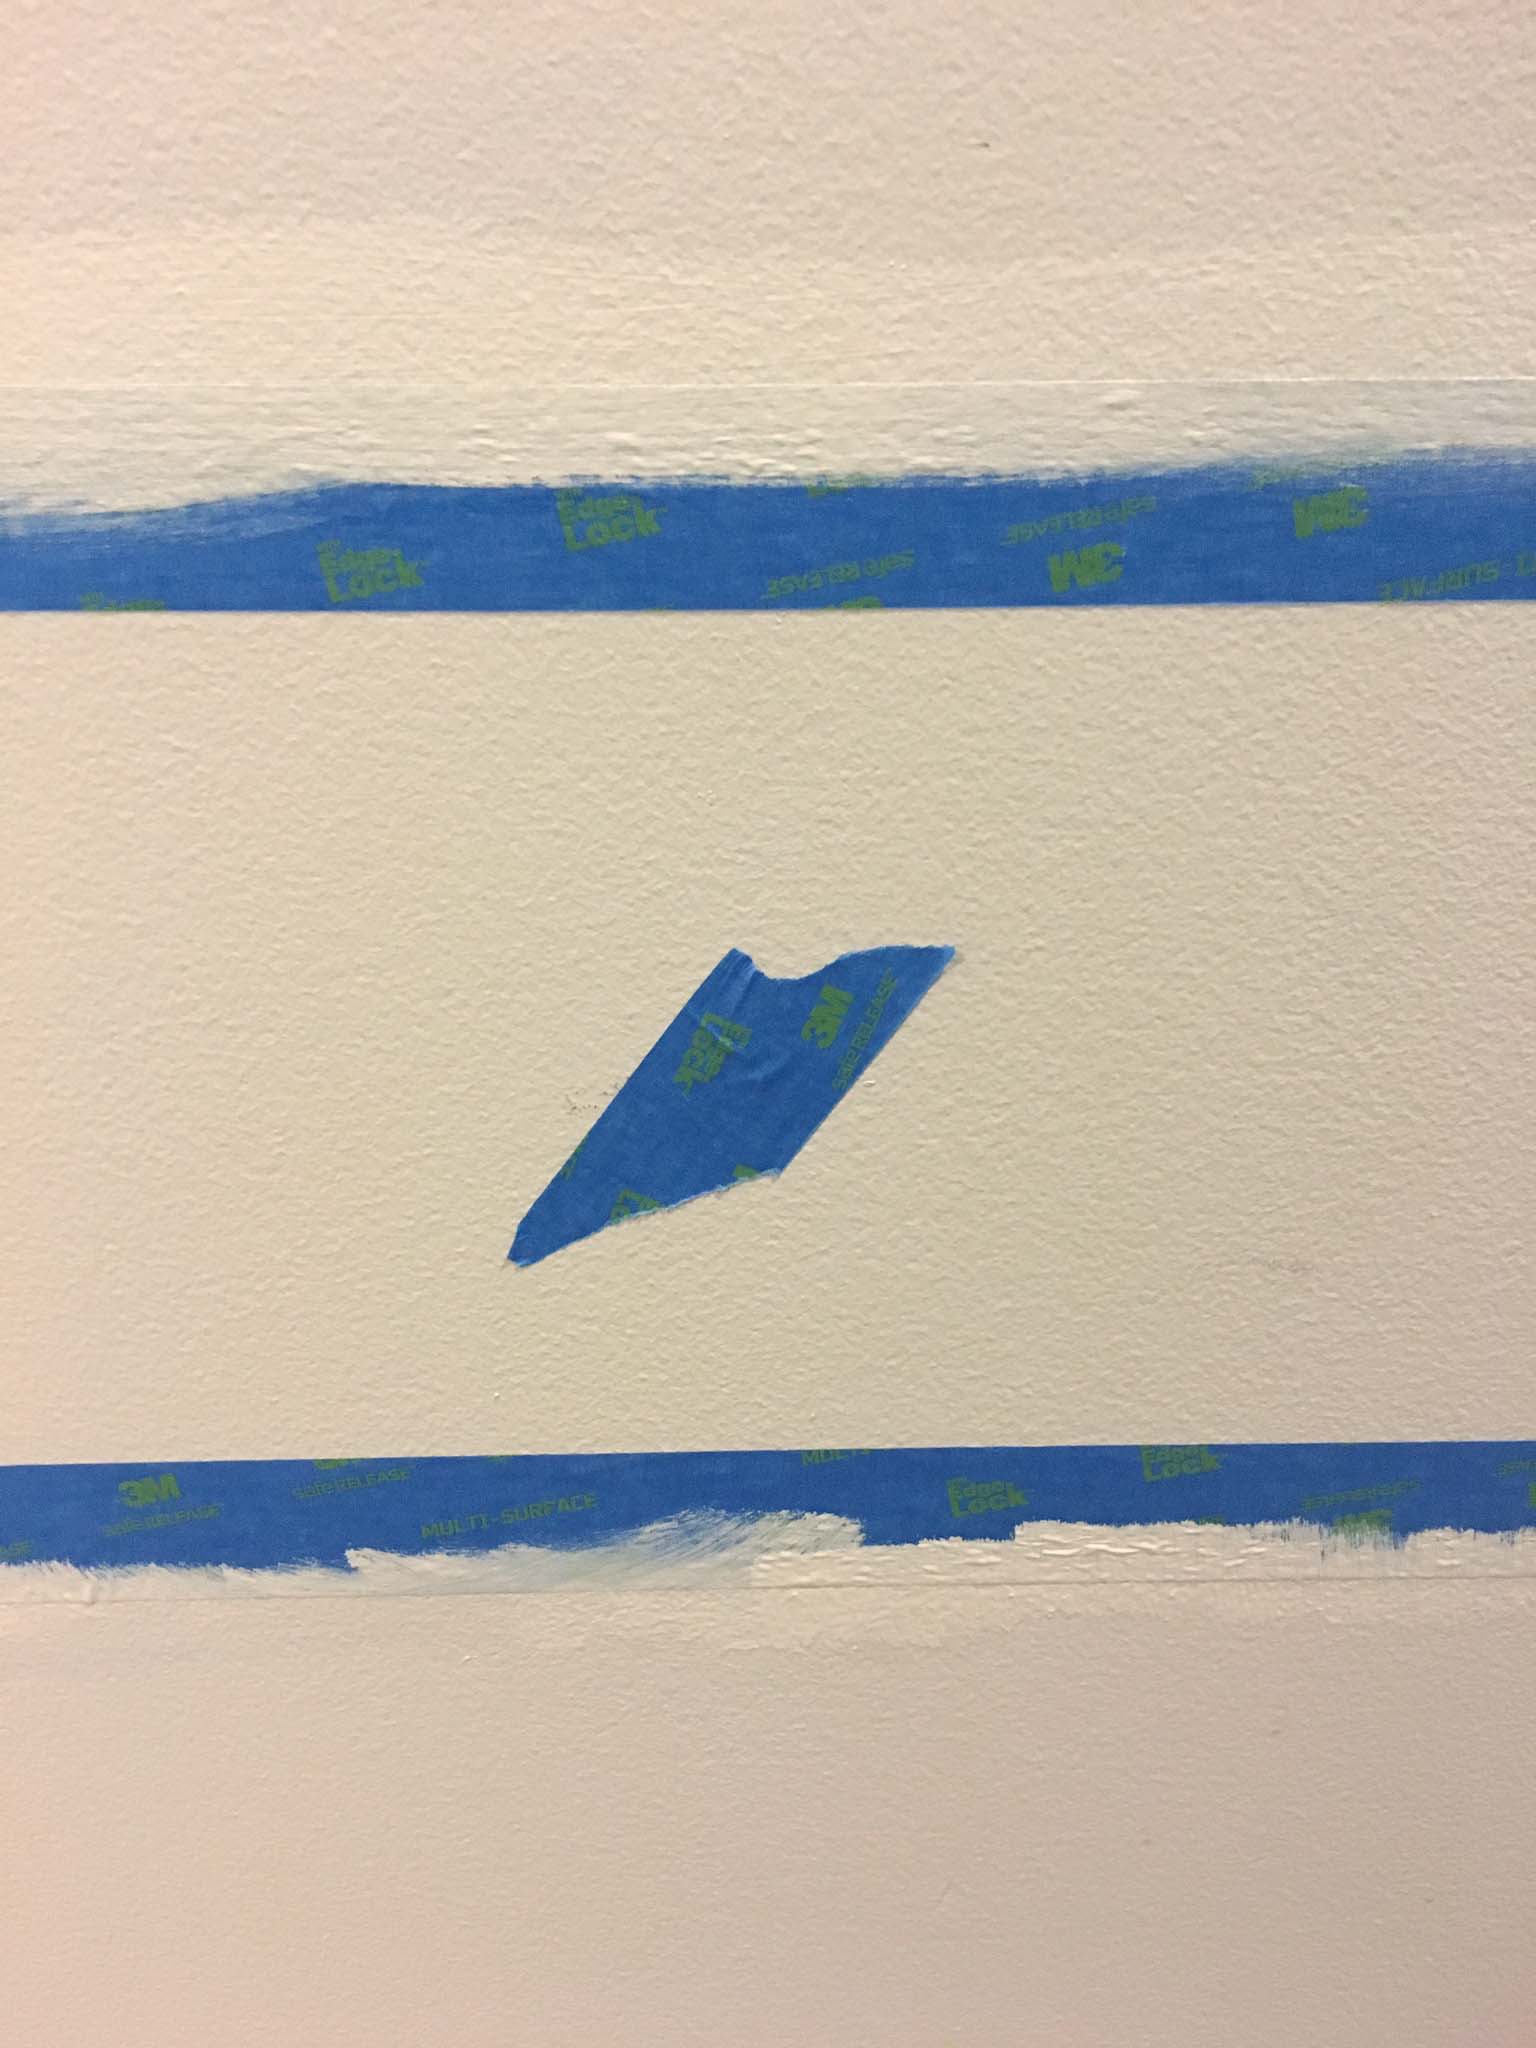
Pro Tip: Place a small piece of tape inside the stripes that you are not going to paint so you can clearly see the difference. 

Pro Tip: Seal down the edges of your tape with paint the same color as the wall/not-to-be-painted stripes. This ensures that any tiny bleed through or wicking of paint will blend right in, giving you a crisp, clean line. 

striped wall // black and white stripes // entryway

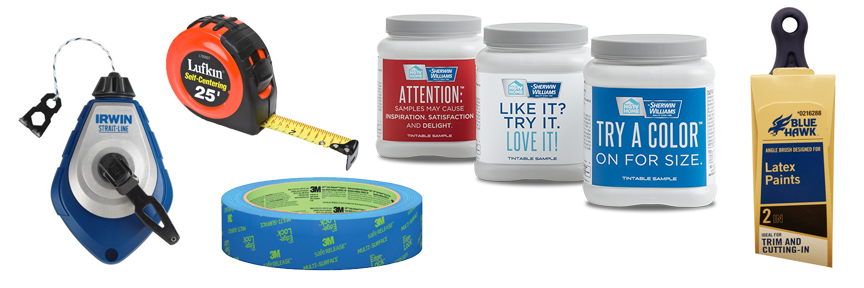
Tools for this project:

  • Tape measure
  • Chalk line
  • 3M brand painters tape (don't skimp and go generic brand here, you want a good seal for crisp, clean lines)
  • A good trim brush--this one is my favorite
  • 1 Quart of Sherwin Williams sample paint (This paint is less than $4 for a quart! It is actually meant for trying out a color on a wall before committing to a larger qty and is only available in an eggshell finish.)
     
how to paint a striped wall // black and white stripes // entryway

DIY Sofa Table

With the wee one learning to crawl, I decided it would be a good idea remove the glass coffee table from the middle of our living room. I planned on replacing it with something more toddler-friendly, but having the open space has been perfect for him to play and I've enjoyed the visual openness too. I contemplated end tables, but our living room just isn't big enough for that much furniture. We do need a place to set a coffee cup or water glass down though, so I began focusing my attention on sofa tables.

I decided this would make a great DIY project and started scouting materials. I settled on a pair of bifold doors that we removed from a closet and we no longer had need for. These were a great solution for a few different reasons. First, the doors are pretty cheap, generic versions, but for this use, that was actually great because it meant they are hollow and therefore lighter. The weight was important because instead of using table legs, I opted for go with wall-mounting hardware. The height of these was also a perfect fit for our sofa and the depth is more than sufficient without being bulky or obtrusive. 

Here is the process of their transformation from closet door to sofa table!

I only needed one panel so I took off the hinges and removed the pieces used to hang it from a track in its former life as a door. I then used some wood filler on all the holes before giving it a good sanding. 

Because the doors were hollow, I needed to add something to attach the wall bracket to. I cut pieces of wood to size and used wood glue and clamps to adhere them to the underside of the soon-to-be shelf. I cut the wood strips a few inches shorter than the overall depth so that they wouldn't show from the front. I also used a triangle to place the strips so I could be certain they were straight. 

After the glue dried and pieces were firmly in place, I wiped everything down and painted it this gorgeous cobalt color. Rather than giving everything a first coat, and then a second, I painted two coats on the underside and edges before flipping it over and painting the top. This way the top was never face-down on un-cured paint. 

When attaching the metal wall brackets, I offset them about 1/2" from the shelf rather having the shelf be flush with the wall. This provides a narrow channel for the cords from table lamps to tuck neatly behind the shelf instead of resting on top. 

Overall, I love how it turned out! I also really like the color--its the perfect pop with all the black and white. I think some throw pillows with a little color will be then next project and the finishing touch for this space!

Color Crush: Yellow

Hi, friends! With summer here in full swing, I wanted to highlight some of my favorite uses of the color yellow. It is such a warm, cheery color and it reminds me of sunshine, lemonade, and days at the beach. Yellow can be a tricky color to work with, but these folks nailed it! 

*If you like these pictures as much as I do and want to pin them to pinterest, please be awesome and click on the pictures then pin from the original sources. Thanks!

2. In this monochromatic kitchen, yellow chair cushions really pop! I especially like how the color adds visual weight to the ghost chairs.

1. The saturation and vibrance of this door are to DIE for. And I adore the use of hot pink as the complimentary color here. Go bold or go home!

4. This wallpaper is everything that wallpaper should be. It manages to pull off playful and fun while remaining sophisticated and elegant. 

3. I am in love with the idea of modern yellow on a vintage fireplace--what a statement! The yellow echoed in the floral rug brings unity and cohesion to the adjoining room.

6. Hairpin legs painted yellow are the perfect amount of color on this hall table and draw out the yellow in the painting above.

5. Here is another example of yellow chairs--in addition to looking divinely comfortable, they pair beautifully with the warm wood tones.